- Flowers
Flower Bulbs Allium Bulbs Anemones Begonia Tubers Crocus Bulbs Daffodil Bulbs Dahlia Tubers Hyacinth Bulbs Lily Bulbs Tulip Bulbs Woodland Flower Bulbs Other Flower BulbsFlower Plants Annual Bedding Plants Children's Flower Plants Clematis Climbing Plants Cottage Garden Plants Exotic Plants Flowers For Cutting Plants Foliage Plants Greenhouse & Indoor Plants Ground Cover Plants Hanging Basket Plants Lavender PlantsHardy Geraniums Herbaceous Border Plants Heuchera Pansies and Violas Patio Plants Water Plants Window Box Plants Winter Bedding Plants Hydrangea Large impact plants Recommended By Our Experts
- Fruit & Vegetables
- Trees, Shrubs & Ornamentals
- House Plants
- Tool Shed
Garden Tools & Equipment Barrows and Trolleys Garden Solutions Harvesting Plant Supports Seed Sowing Tree Stakes Water Butts Weed Control Hand Tools Secateurs, Snips and Pruners WorkshopGarden Irrigation & Watering Irrigation Kits Water Butts Hoses & Sprays Miscellaneous Fertilisers Plant Pots Hanging Baskets Plant Protection Garden Compost All Compost
- Outdoor Living
Garden Living Barbecues & Firepits Garden Storage Solar Lights & Lighting Fixtures & Ornaments Awnings Sail Shades Garden Clocks Landscaping Lawn Edging PavingPatio Heaters Gas Patio Heaters Electric Patio Heaters Fire Pits, Chimeneas, Fire Baskets Wallmounted/Ceiling Patio Heaters Freestanding/Table Top Patio Heaters Water Features Solar Powered Water Features Mains Powered Water Features Indoor Water Features Outdoor Water FeaturesGarden Furniture Rattan Furniture Parasols Garden Benches Dining Sets Loungers Wooden Furniture Party Tents & Gazebos
- Wild Birds
- Gardening Info
- Special Offers
- First Early: You can harvest these about 10 weeks after planting. This variety will produce new or baby potatoes ideal for boiling or steaming.
- Second Early: Maturing slightly later, these can be harvested about 14 weeks after planting. They’re excellent for general purpose use, with many varieties making particularly good salad potatoes.
- Maincrop: These are great for winter storage and can be harvested up to 20 weeks after planting. Grow these for roasting, baking, and mashing.
- Second Cropping/Christmas Cropping: Planted in late summer/early autumn, these can be harvested about 14 weeks after planting, the same as second earlies.
- • Break up the soil with a garden fork and dig in some organic matter, such as compost, well-rotted manure, or recycled green waste.
- • Plant your 'chitted' potatoes 30cm (1ft) apart for first and second earlies, and 45cm apart for maincrop types. Rows should be set out 60cm (2ft) apart.
- • Plant your potatoes with the sprouts upright, at a depth of about 10-15cm (3-6 inches).
- • Cover the potatoes with soil and water them in.
- • Once the plants are 25cm (10 inches) tall, draw the soil up and around them until it’s about halfway up the stem. This is called 'earthing up' and prevents potatoes near the surface from turning green and inedible.
- • Fill the bag a third full with multipurpose compost and work in some slow-release potato fertiliser.
- • Place your chitted potatoes on the compost.
- • Cover the potatoes with around 15cm (6 inches) of compost and then water them in. Once the shoots reach 25cm (10 inches) tall, top up your potato grow bag with more compost (you want the compost to reach halfway up the stems).
- • Keep adding compost as your potatoes grow to prevent potatoes at the surface from turning green in the sunlight and being inedible.
- Ground: Cover potato plants in the ground with some horticultural fleece. This thin, unwoven polypropylene fabric will protect your plants from the cold, as well as from insects.
- Grow bags: Move your potato grow bags (or containers) to a sheltered, frost-free spot during the worst of the weather. But if the worst happens, potato plants often can recover from a bit of light frost damage.
Join Our Gardening ClubVan Meuwen Gardening Club
Become a Member
Join our Gardening Club to unlock exciting perks and discounts!
JUST £10 for one year's membership
10% OFF EVERY order placed online £20 worth of Van Meuwen Vouchers Exclusive members only deals Join NowHow to plant and grow potatoes
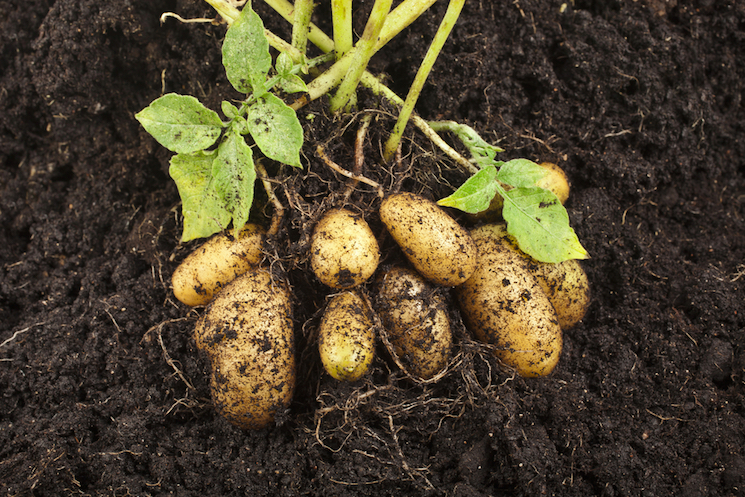
Here's our expert tips and tricks to successfully growing potatoes in UK gardens.
Image: ShutterstockThere's nothing like the taste of fresh, home-grown potatoes. They’re unlike anything you can buy in a shop and, in addition to punching way above their weight in flavour, they’re packed with nutrients including vitamins C, B6, and potassium.
They're also easy to grow, whether your garden has acres of space or just enough room for a container or two. Here’s our guide on to how to plant and grow potatoes – you’re just a few months away from your very first harvest.How long does it take to grow potatoes?
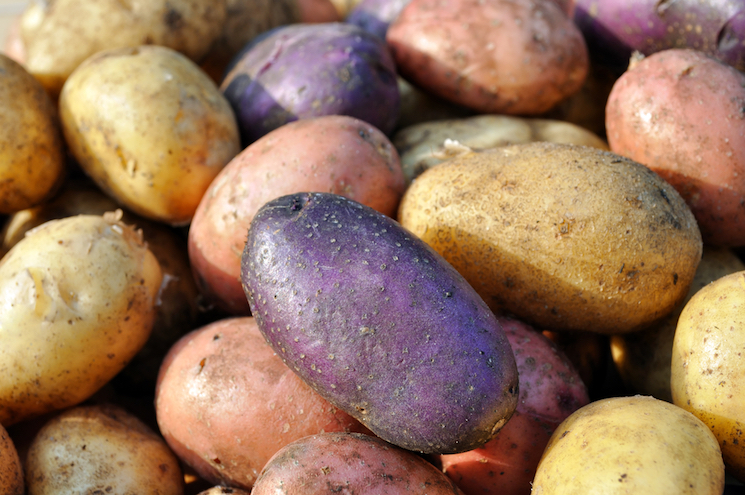
Different varieties of potato grow for different lengths of time.
Image: ShutterstockHow long it takes to grow potatoes depends on the variety you pick. So keep this in mind before you decide which variety of seed potatoes to get.
What month do you plant potatoes?
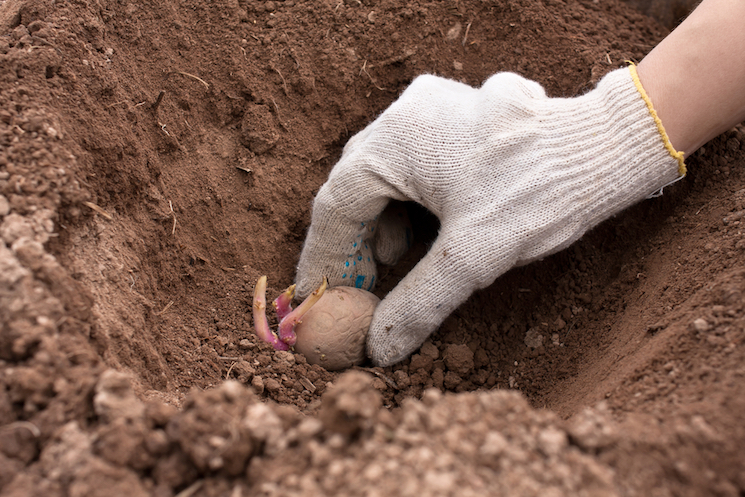
Plant your chitted seed potatoes in March, or later in the year.
Image: ShutterstockTypically, potatoes are planted in March for harvesting throughout the summer and autumn months. But they can also be planted in August or September so that you can enjoy new potatoes around Christmas.
But before you can plant your potatoes, the seed potatoes themselves need to be chitted. This is just another way of saying “sprouted.” Basically, you kick off the growing process of the seed potatoes before you plant them out.How long should potatoes be chitted for?
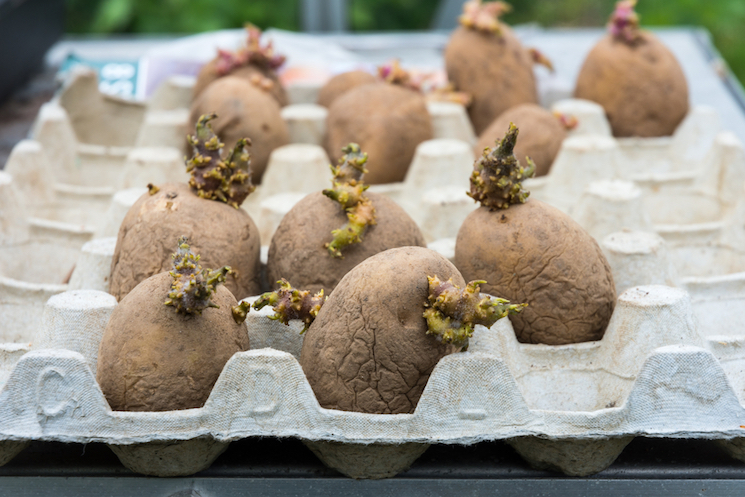
Egg trays make a great chitting solution for your potatoes.
Image: ShutterstockWhen you’ve taken delivery of your seed potatoes, you need to set them out in a cool, dry and bright position to allow them to start chitting. Ideally, it needs to be somewhere frost-free with a steady temperature. A garage or conservatory is ideal, if you have one.
While you can buy dedicated chitting trays, many gardeners swear by old egg cartons as they’re the perfect size to keep seed potatoes upright and dry. Alternatively, a seed tray with some scrunched up paper at the bottom will do. Just make sure to arrange the potatoes in a single layer, with as many of the ‘eyes’ facing upwards as possible.
Aim to start chitting your potatoes around six weeks before you plant them out.How do you plant potatoes in the ground?
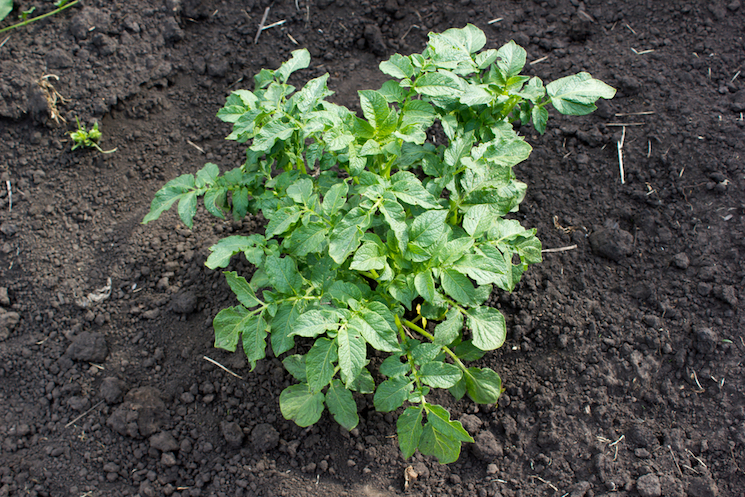
Break up the soil well and add plenty of nutrients to give your plants the best shot.
Image: ShutterstockIf you have space in your garden, it’s easy to plant potatoes in the ground. They’re happy in most kinds of soil. And, as an added benefit, they act as a great first crop to break up the soil. You can plant them directly in the earth, or in raised beds – you’ll get a good yield either way by following these easy steps.
How do you plant potatoes in a container?
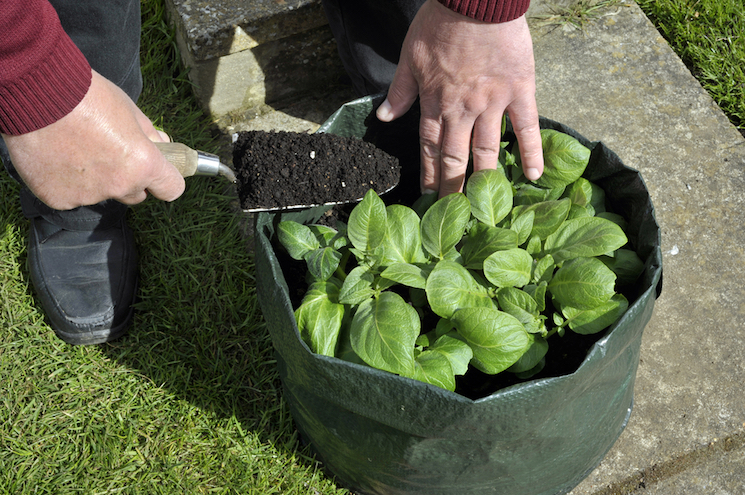
Potatoes will grow happily in containers or special potato growing bags.
Image: ShutterstockIf you have limited space in your garden, don’t worry! Potato grow bags are a simple solution to potato perfection. In fact, growing potatoes in bags reduces the risk of pests and diseases. Try our Potato Grow Bag Kit to get you started.
Watch our quick video guide on how to grow potatoes in growing bags:
How do you care for potato plants?
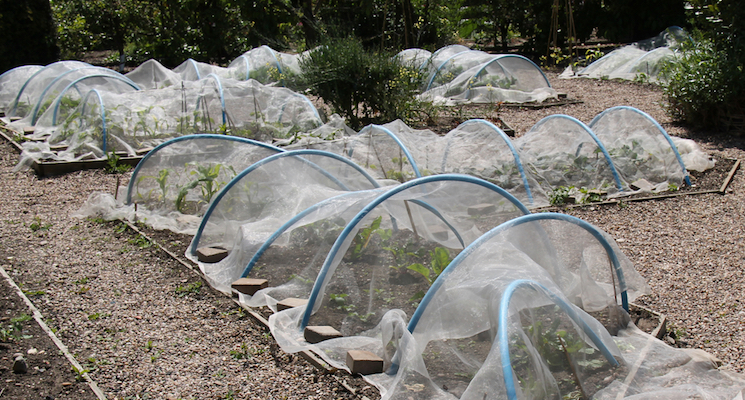
Horticultural fleece is a great way to protect your potato plants.
Image: ShutterstockWhile potatoes are easy to grow, there’s one main thing to remember – you need to protect them from frost.
If frost threatens the shoots of your potato plants, protect them by lightly covering the shoots with a little soil or compost. However, if it’s a hard frost, you have two options, depending on how you’re growing them.Apart from frost, make sure your potato plants stay well-watered during dry periods. Potatoes in the ground won't need feeding, provided the soil is fertile and you incorporated lots of well-rotted manure prior to planting. Potatoes in containers, on the other hand, will benefit from having some slow-release potato fertiliser added before planting, or being fed weekly with a balanced liquid fertiliser.
When do you harvest potatoes?
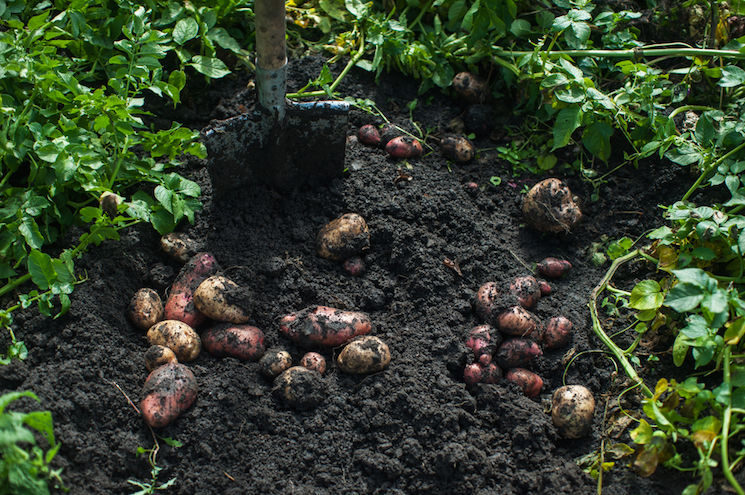
Gently dig up your potatoes with a pitchfork or spade when they?re ready.
Image: ShutterstockWhen you harvest your potatoes depends on the variety, so it’s best to note down the date of planting on your calendar to give you a rough indication.
But if you pay attention to the plants themselves, there are a few tell-tale signs. For example, the foliage of maincrop potatoes will turn yellow when it’s time to harvest. And for early varieties, it's worth having a gentle dig below the surface to check the potato sizes – if they're too small simply leave them for another week or so, otherwise lift them out and enjoy!
Have you ever grown your own potatoes? Do you have any tips or suggestions for particular varieties? Share them with us over on our Facebook page, and find some useful tips from other people while you’re there!Quick Links:

Aim to start chitting your potatoes 6 weeks before you plan to plant them.
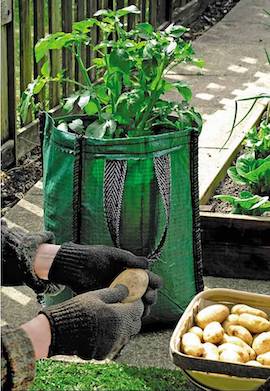
If you have limited space then try using potato growing bags - perfect for producing crops on the patio or balcony.

There's nothing like the taste of fresh, home-grown potatoes.
Sign up to the Van Meuwen Gardener's Club for Special Offers
Delivery Information Privacy Policy Cookies Terms of Business Affiliate Programme Planting & Cultural Advice Contact Us© 2025 Van Meuwen. All rights reserved. A division of Branded Garden Products Limited.
- House Plants
